3D Printed Stuff
This is an assortment of stuff I've 3D printed. I've tried to limit it to stuff I've designed, and also to stuff that isn't part of another project (e.g. the gunpla bit stands won't appear here). It's not anything particularly big, complex, or impressive, but it's usually useful and that's good enough.
My printer is a Creality Ender 2 Pro, with a dual-gear extruder and upgraded PTFE bowden tubing. I print exclusively in PLA, and tend to prefer Polymaker Polyterra, although at the moment I have a mix of filaments including some matte finish Filamentive and some slightly glossy Vertex. I design stuff using FreeCAD, although I've had a bunch of prior experience with commercial CAD software like Solidworks.
Artificial Plant Wall Holders
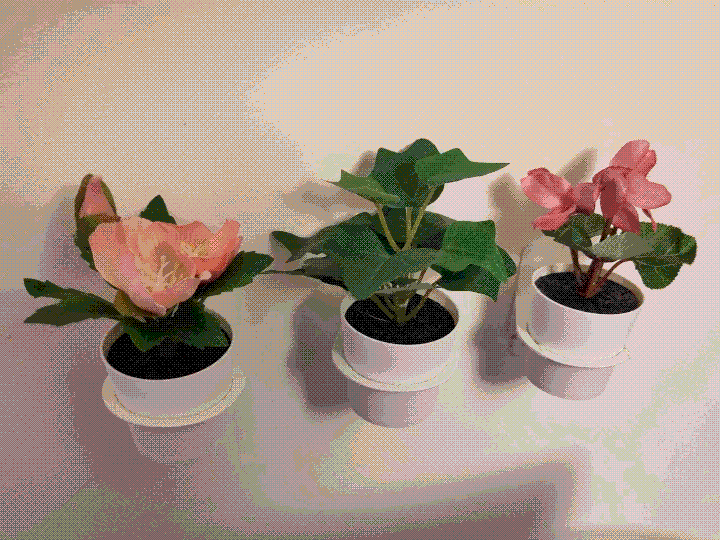
In my continued quest to make my living space more pleasant to exist in, I got some little artificial plants from IKEA. I did not, however, really think about how I was going to mount them beyond 'well I can probably just print something'. The design ended up being pretty simple, just using the taper of the pots and gravity to hold them in a hoop.
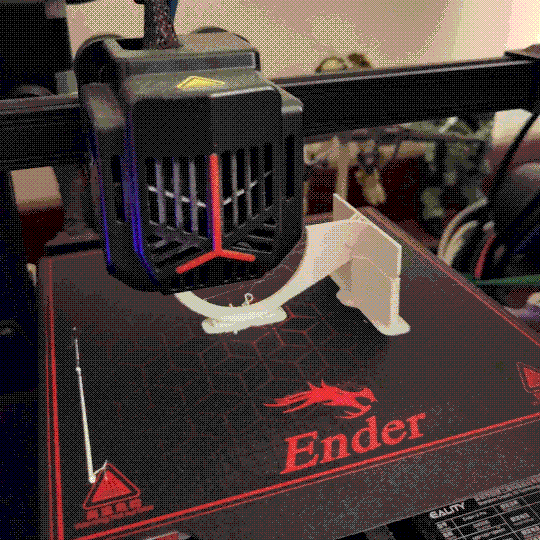

I chose to print them sideways to make sure I got good in-plane strength in the direction of the bending forces, although in reality there isn't continuous material going from the far edge of the hoop to the base where it's mounted anyway. In order to actually mount it, I used 3M 'Command' strips (a very common tool for me) to hopefully non-permanently stick each one to the wall.
Film Container Rack Hook

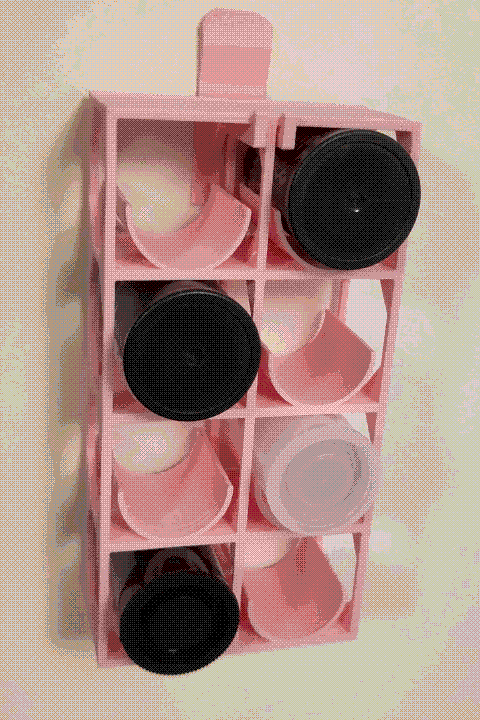
I needed a way to mount this film container rack to the wall, so I designed a little hook for it. Like the artificial plant holders, this uses a removable adhesive strip to attach it to the wall, while two prongs go either side of the central strut of the rack and hold it up. These do actually get a tiny bit heavy, so printing it sideways to ensure the part was strong in the correct direction was more important here.
Magnetic Bolt Dish
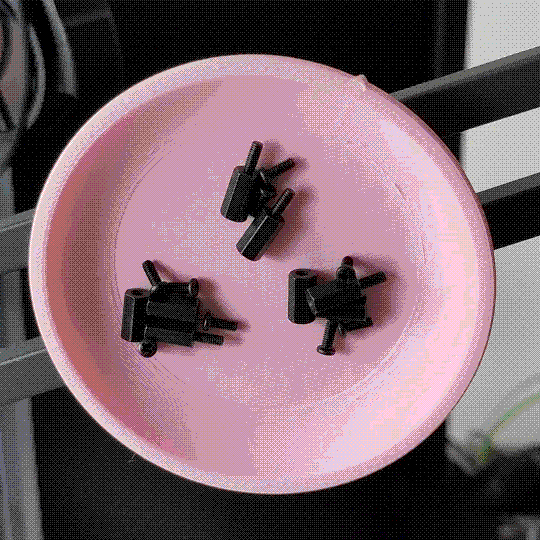

This is one I'd been meaning to do for awhile and finally got around to. I often need to keep small bolts from vanishing while I'm assembling/disassembling something, and with some small magnets I found online, it's actually fairly simple to 3D print magnetic bolt dishes. The part needs to have actual cavities in the inside, and then the print has to pause before the 'ceiling' starts to be printed. I also put in a little bit of superglue to make sure the magnets stayed but, but that's really not necessary.
Whiteboard Mounting Hooks
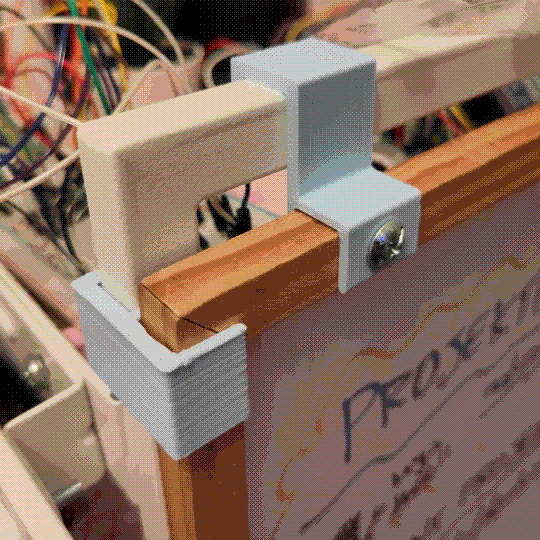
So I have a wheeled cart that should probably get its own project subpage at some point, but basically it's a little mobile storage unit I keep most of the stuff for my Projects on: breadboards with stuff on them, a pegboard with consumables and keyboards hooked on the side, a label maker, and so on. One of the things I wanted to add was an old whiteboard I salvaged from uni, so in typical engineering student fashion, I overdesigned it. Behold, the whiteboard mounting hooks.
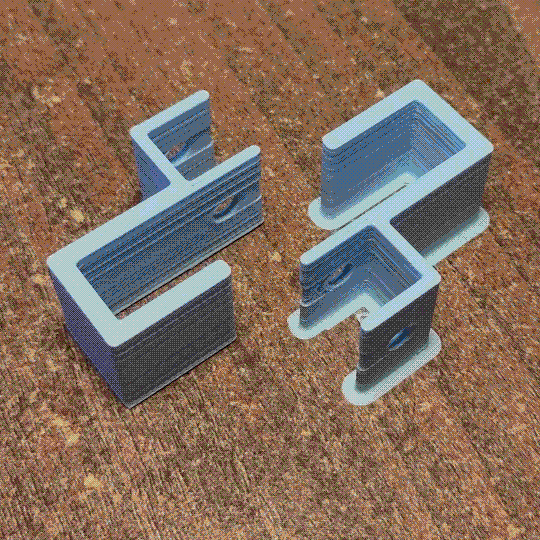
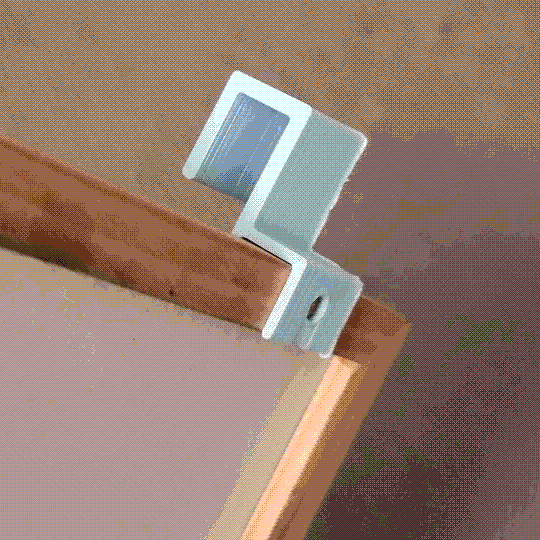
The design isn't really that complicated, it's just a pair of hooks: one hook has a pair of holes to allow the whiteboard to be through-bolted to it, and the other one just stays on the frame of the cart via gravity. Two pairs of spacer pieces at the top and bottom just stay on via friction and keep the whiteboard stable, since the hooks have some non-negligible thickness. The bolts are probably massively over-specced, but I didn't do any calculations either way so better safe than sorry.
LED Bar Mount
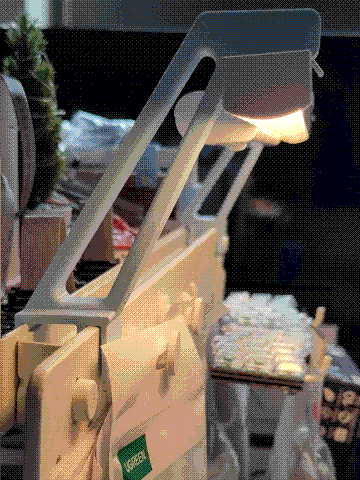
Another thing I wanted to attach to the cart was an LED bar over the pegboard, both for pratical and aesthetic reasons. So I went to IKEA, got a reasonable LED light bar, and figured out a way to mount it onto the side of the cart!
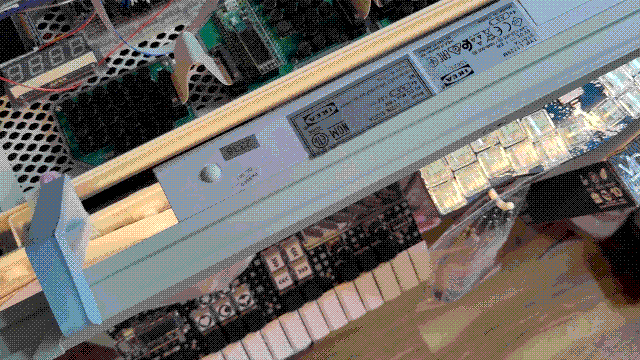
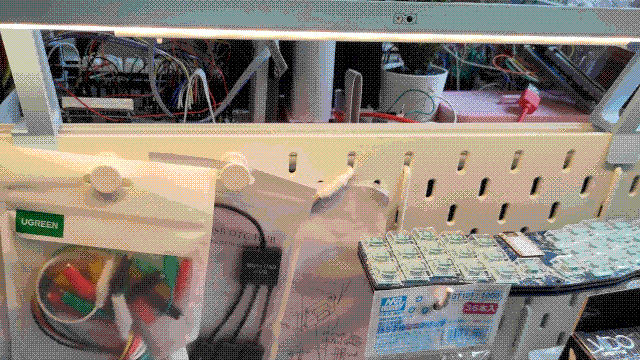
This is actually pretty appropriately engineered: the LED bar mounts to the top using the screwed-in clips that it comes with, while the bottom of the mounts attach to the cart by sharing the bolts that attach the pegboard to the side, resting on the top of the pegboard for support. The only part that's a bit overdesigned is that each mount has a little nub that clip into a hole on the pegboard to keep it even more securely located, which does make it a bit more stable but isn't really necessary.
Clock Cube Wall Shelf
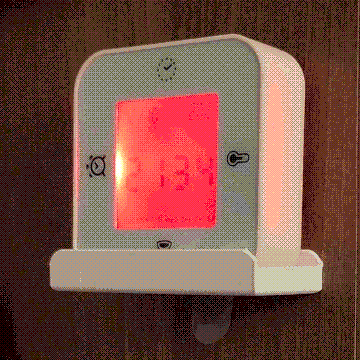
This thing is extremely simple: just a little shelf for an IKEA KLOCKIS combo clock/alarm/timer/thermometer (although I use it exclusively as a thermometer). It attaches with a 3M 'Command' adhesive strip, like the wall mounts above. While not a complex idea or design, it's little things like this that let me optimize my living space better.